

Upon each new season (in this case it was fall) I love to go to the store and shop the newest home décor trends. I don’t necessarily buy anything, I just really enjoy looking at the new styles of décor and like to get an idea of what I could do to decorate my home. Typically, I will head to Hobby Lobby, Target and Home Goods to see what is trending. In this case, I was on a mission to get all of the items needed to make a DIY floral arrangement with an acrylic-look “water”.
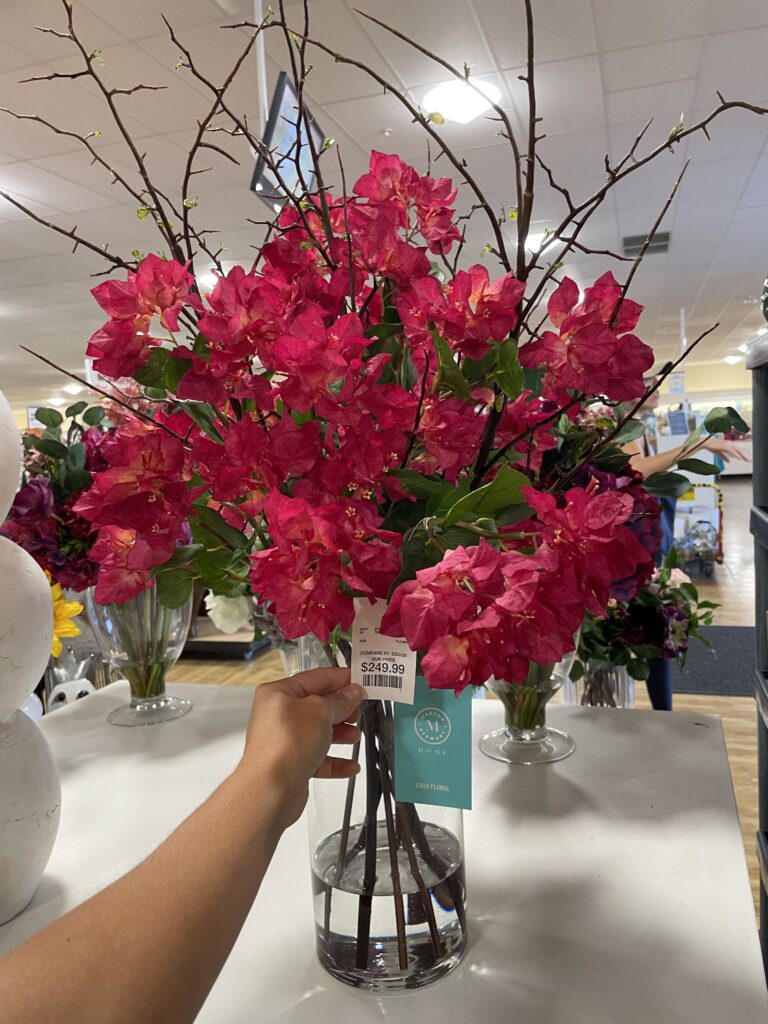
While I was at Home Goods last week, I stumbled across this gorgeous silk floral arrangement and loved the acrylic water and the tall, lean vase it was sitting in. It was perfect in every way, except one; the price was $250. I peeled it out of my fingers in sadness and laid it back onto the shelf. There was no way I could afford to pay $250 for this item. As I walked away from it, a light bulb started going off in my head. Um, hello…. Why couldn’t I just make my own?? I could, I did and keep reading to see how you can, too.
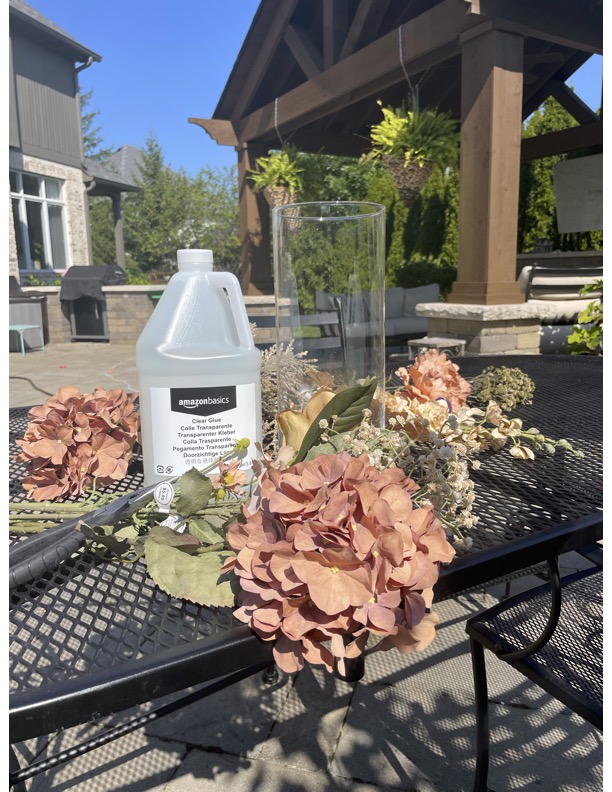
I left the décor section of Home Goods and headed straight to the vases, where I found this beauty for just $12.99.
It literally looked exactly like the vase from the store’s arrangement, height and all. Perfect. I had about an hour before I had to pick the kids up from school, so quickly checked out and ran to Hobby Lobby to shop their fall florals and apparently it was my lucky day because they were all half off! Can I get an amen?!
While I loved the fuchsia florals in my inspiration arrangement, I actually was going for a more fall and autumn look. After all, fall was just around the corner and Starbucks was already selling Pumpkin Spice lattes, so I had the social green light, right? Whatever.
By the time I got to Hobby Lobby, I had no time to waste.
To the fall florals I headed
I grabbed about a zillion stems of beautiful autumn “blooms” (actually, just twelve) and then headed to the checkout counter. They were all half off, so I ended up only spending about $60 on them. While $60 is no small amount of cash, it was way less expensive than buying that other arrangement, which by the way, only had nine stems in it.
I got the kids from school, just in time, phew, and headed back to the house. While the girls did their homework, I setup shop outside so Michael could run freely I the yard while I worked on this arrangement.
The last item I needed for this project was clear liquid glue, and luckily, I had a gallon of it on hand from a previous project. It was purchased from Amazon last year, here, and works like a charm.
Supply List:
- Vase
- Silk Florals
- Clear Liquid Glue (like Elmer’s)
- Floral Tape (if needed)
- Scotch Tape (if needed)
- Wire cutters for the stems
I am no pro…
Now, you need to know, that I am not a florist and I really don’t have any sound advice on how to put together a beautiful arrangement. I essentially grabbed florals I thought were pretty, stacked them together in my hand, stem by stem, and did this until it looked full on all sides. If anything looked out of place, I’d simply move it to another spot or remove it all together. You do whatever you think looks best with your floral selection.
Once I had a beautiful bouquet in hand, I then measured the stems against the vase to see how much trimming I needed to do. I had to cut somewhere between 5-7 inches off each stem with my wire cutters. Then, I simply did a dry fit and placed the bouquet into the vase to get a better feel on how it looked. I made a few adjustments, but overall was quite pleased with the way it was all coming together.
Something needed to change
There was, however, one thing that was not sitting well with me; two of the twelve stems in the clear vase were brown and not green like the others. So, I grabbed floral tape I had on hand and wrapped the brown stem with the green floral tape to make sure they all matched. Then, I took scotch tape, and gently wrapped it around the top section of the stems, right underneath the lowest blooming sections so that the flowers didn’t shift too much when I went to permanently place them into the vase.
Now came the nerve-wracking part…the “acrylic water…”
I had to pour a large portion of glue directly into the bottom of the vase without allowing the glue to touch the sides of the vase. If the glue happened to get on the edges of the vase, it would be very hard to clean up. Truthfully, I should’ve used a funnel to pour it, but I like living life on the edge. And, thankfully, I did it successfully, about 20% of the way up the vase, just like the one I had seen at the store.
Then came nerve-wracking part II….
It was time to permanently place the florals into the glue. So, again, I checked the arrangement to make sure everything was looking good. Once it was placed into the glue, there was no turning back. This step would be the make or break for the entire project. Worry not, it went off without a hitch, and here is what it looked like just seconds after I put it in the glue.
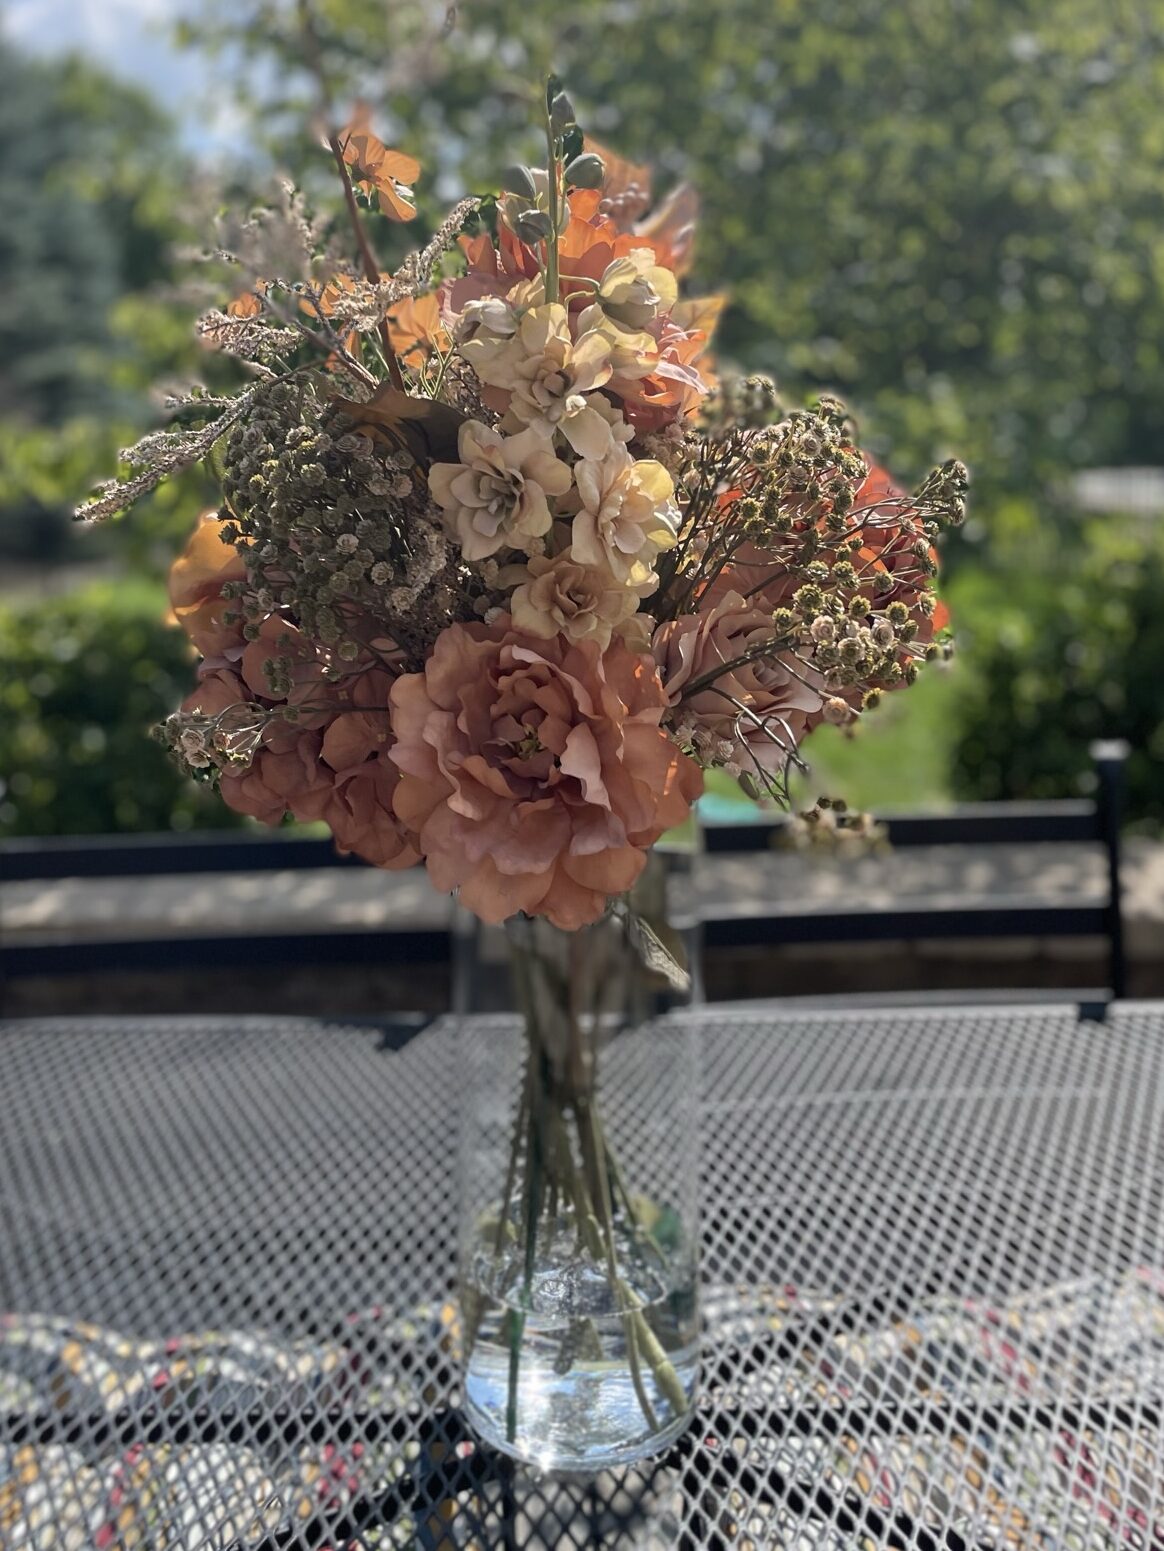
I personally love how the glue looks acrylic water. You should know the glue doesn’t dry over night. It takes 5-7 days depending on how much you used, so you want to make sure you place this in a very safe location where there is no risk of it getting knocked over. Otherwise, you are pretty much done! You just need to find the perfect spot to display your new, “not-$250 -floral-arrangement,” with faux acrylic water.
Imagine the endless arrangements you could make throughout the year… I really enjoyed this process and am excited to start more of these. Tell me, what are your thoughts? Is this an afternoon craft you’d take on?
Watch the floral arrangement video here or click here to checkout some other DIY friendly projects.

UPDATE: It has been about four months since I tackled this project and I have one pretty important thing to point out. After a few months time, the glue shrank down and turned an amber color. While this is quite disappointing, I think next time, I will try to do an epoxy pour with clear epoxy (or get creative with a colorful epoxy). I plan to paint the bottom half of the vase to hide the glue. It’ll still look nice, but won’t show off that acrylic water look I was going for.
Disclaimer: This post contains affiliate links. This means, if you purchase something from a link I provided, I will receive a small commission. This is at no extra cost to you! Thank you for your support!


