


How to Build a Budget-Friendly Planter for Instant Curb Appeal
After a few too many bland glances at my front window, I decided to take on a budget-friendly curb appeal project and build my own DIY window box. The best part? It’s so much cheaper than buying one—and you get bragging rights for tackling a real beginner woodworking project.
Let’s construct a DIY window box and do it on a budget for some friendly planter curb appeal. PS. if you want to watch the quick video tutorial, click HERE.
Spoiler: the hard work was worth it!
A little personal confession: a few years ago, my mom asked if I’d make her a window box. Of course I said yes—and honestly, it turned out stunning. Ever since, I’ve eyed that window box at her place and felt a pang of envy every time I visited (her flowers look SO good). Fast forward three years, and I’m finally building one for myself. I can’t tell you how excited I am to finally have my own, and I’m pretty sure mine will end up being just as pretty—if not a little bit prettier (don’t tell my mom).
Getting Started: DIY Window Box Materials, Tools & Planning
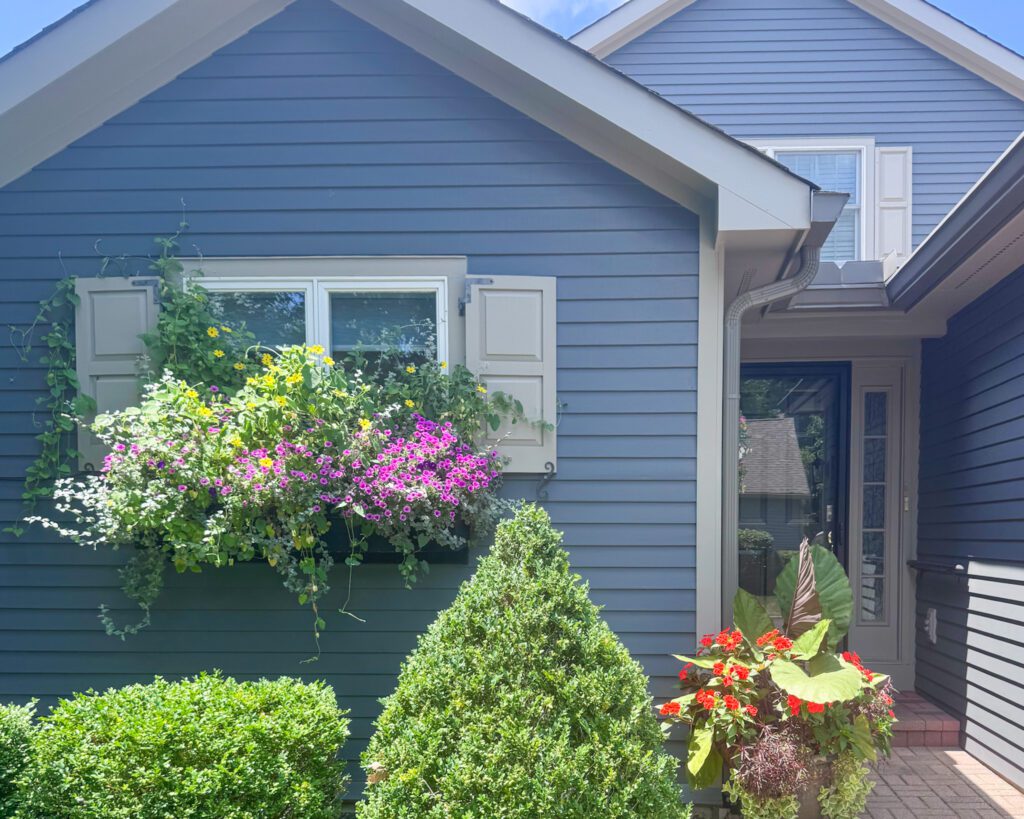
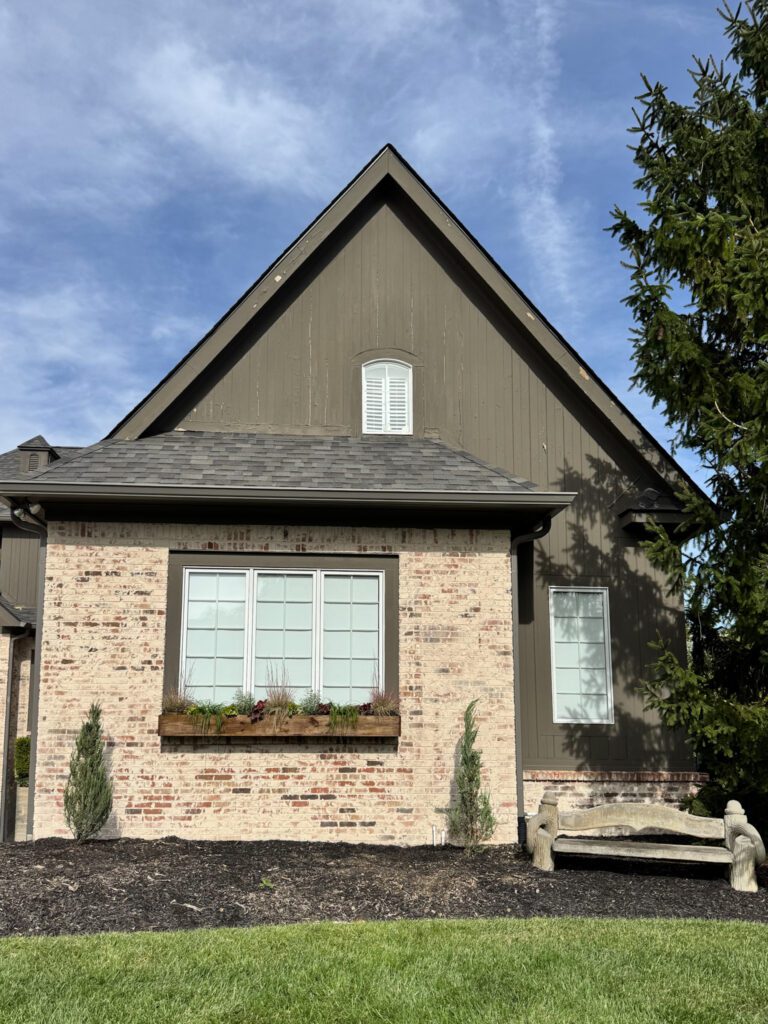
This tutorial walks you through building an 8-foot-wide window box with an extra-roomy 16-inch base (which becomes about 14 inches deep once the sides are on—perfect for those roots to stretch out and thrive). I built this exact size for my own place and, no joke, the thing is a showstopper. If you want a planter that’s shorter or longer, just use this method and tweak the board lengths to fit your space. The process is the same, so you’ll be all set no matter what size you choose.
Quick Materials Checklist (for an 8-foot wide window box)
CLICK HERE FOR MATERIALS IN ONE SPOT
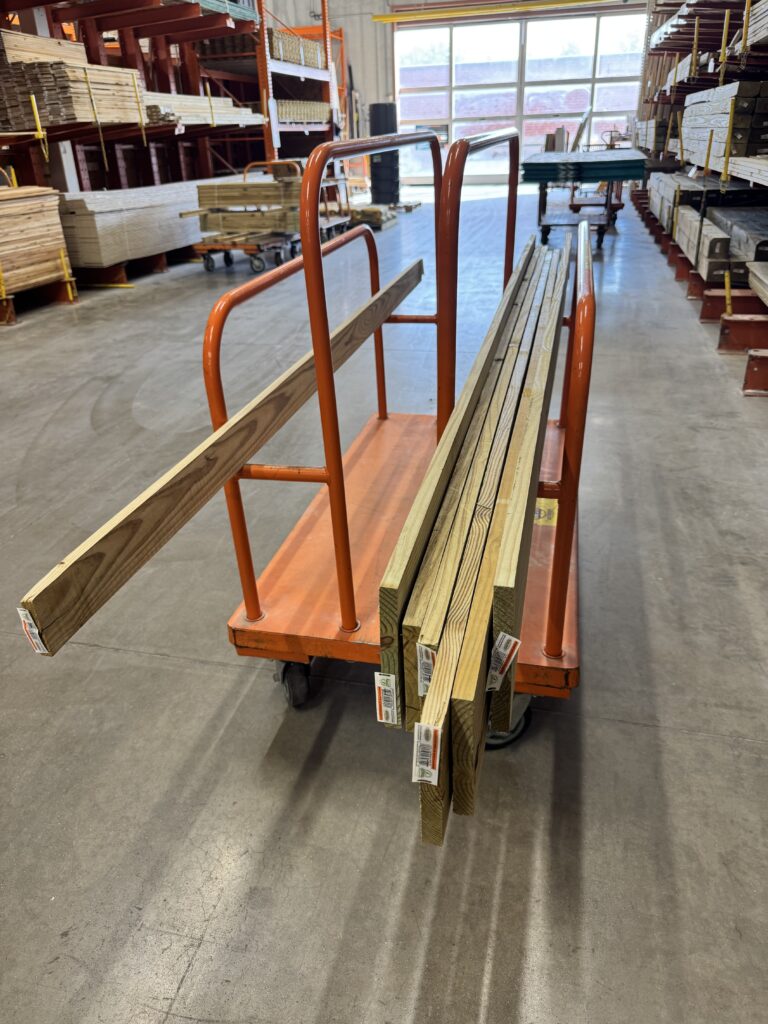
- (5) 1×8 pressure-treated boards, 8 feet long each (for the front, back, and base, joined together to make a spacious 16-inch base—which ends up about 14 inches deep once you attach the sides)
- (4) Galvanized mending plates, 6″ size (for extra support along the seams)
- (6) Corner braces, 2″ size (one for each corner, plus extra if you want more reinforcement)
- (3-4) Mounting brackets, 4″ size (optional, for securing to the wall)
- Exterior wood screws, 2½” length
- (4) Screw eyes, 3″ size (for optional hanging support)
- Metal chain, 2 pieces, length as needed if you choose to hang for extra support (mine ended up being about a foot on either size)
- Outdoor wood stain or exterior paint/sealer (enough for an 8-foot box)
- Scrap wood for bracing (optional—1×3 or similar, cut to fit between brackets)
Tools for Your Beginner Woodworking Project
- Tape Measure
- Pencil
- Circular saw or miter saw
- Power drill & impact driver (plus a set of bits)
- Sanding block or power sander (120 grit)
- Paintbrush, roller, or spray paint for finishing
- Gloves & safety glasses
What you need to know…
Estimated Time & Budget Considerations
- Time: 3-4 hours, give or take (add a little extra for SWIG breaks).
- Budget note: Making your own DIY window box is dramatically more affordable than buying a premade planter—and infinitely more fun. Skill-wise, you don’t need to be a pro—just comfortable measuring, cutting, drilling, and laughing at a mistake or two along the way.
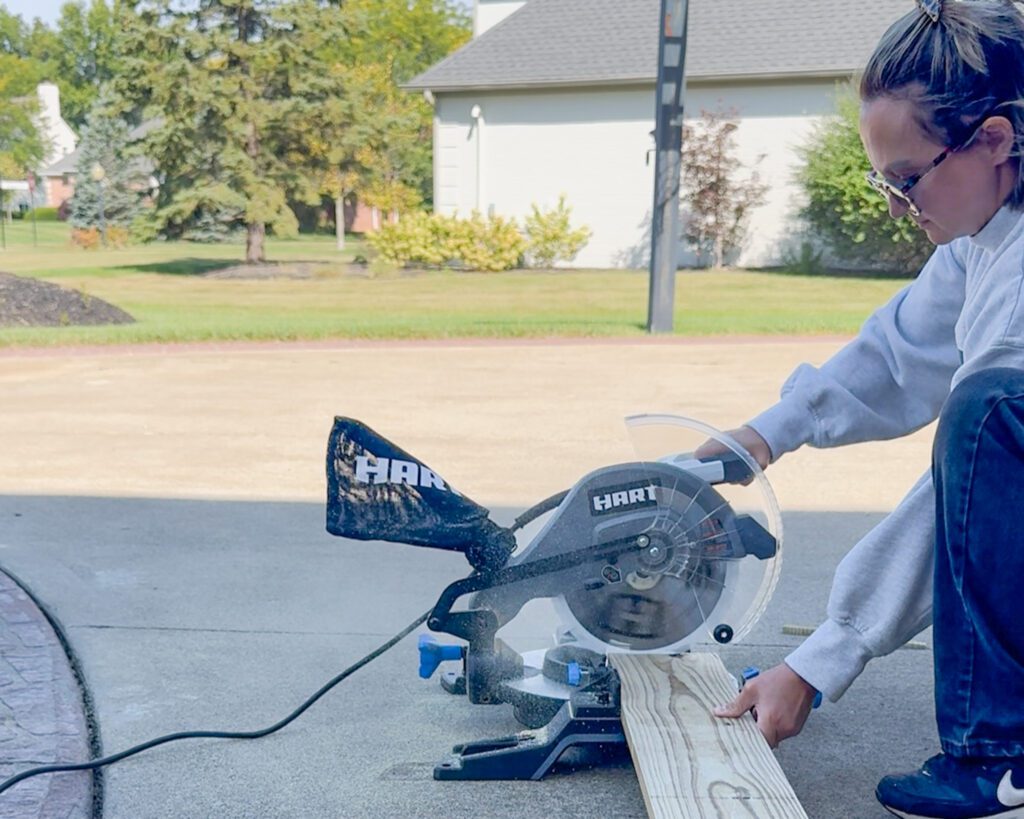
1. Trim & Prep Your Boards for a Custom Window Box
Grab your pressure-treated boards and trim the edges with your saw for a crisp, custom look. This one step truly upgrades your DIY window box, making it look professional.
2. Build the Planter Box Frame
- Join two 1x8s end to end using galvanized 6″ mending plates on the inside. Pre-drill your plates and use exterior screws for a rock-solid connection.
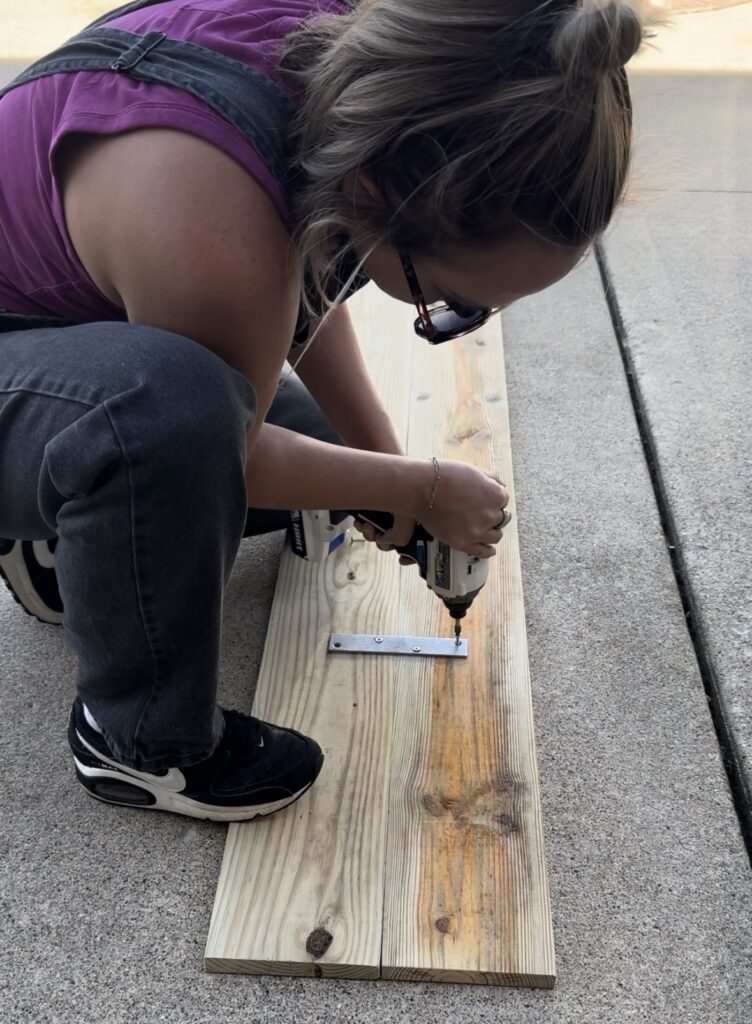
- Add corner braces at the box edges for extra stability—inside, outside, or both.
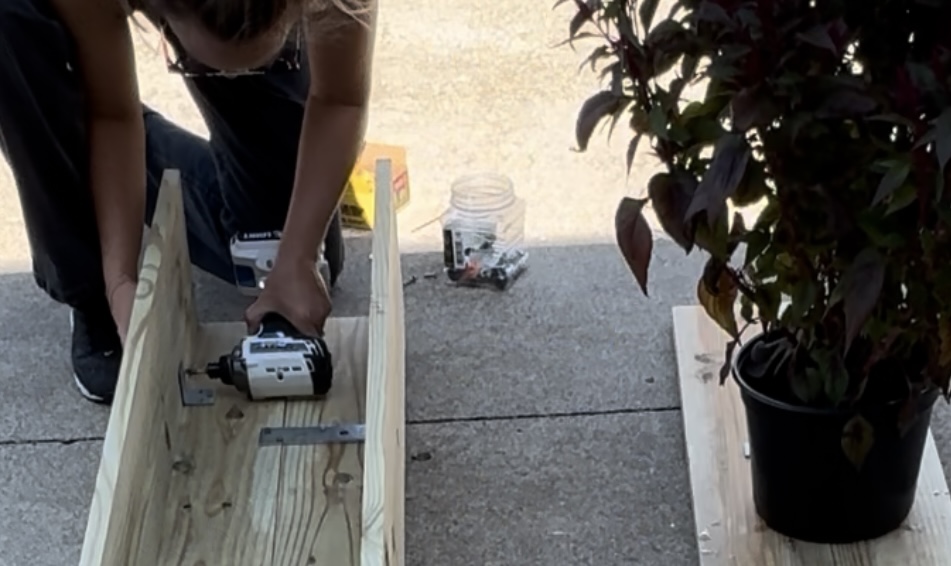
- Assemble the frame with screws, connecting the long sides and boxing in the ends with scrap pieces. Don’t be afraid to improvise – that’s how most of my projects are HAHA
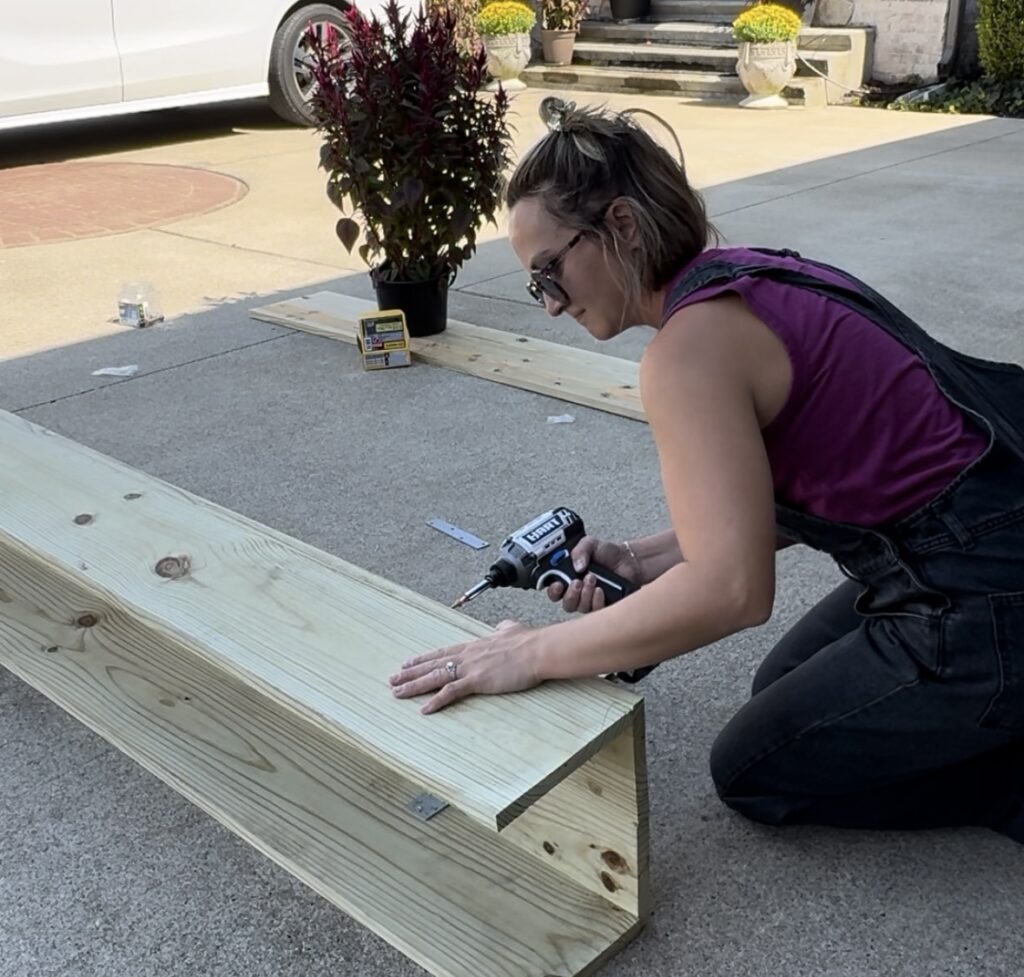
- Bonus tip: Use leftover wood for additional internal braces, spaced as evenly as you can for max durability.
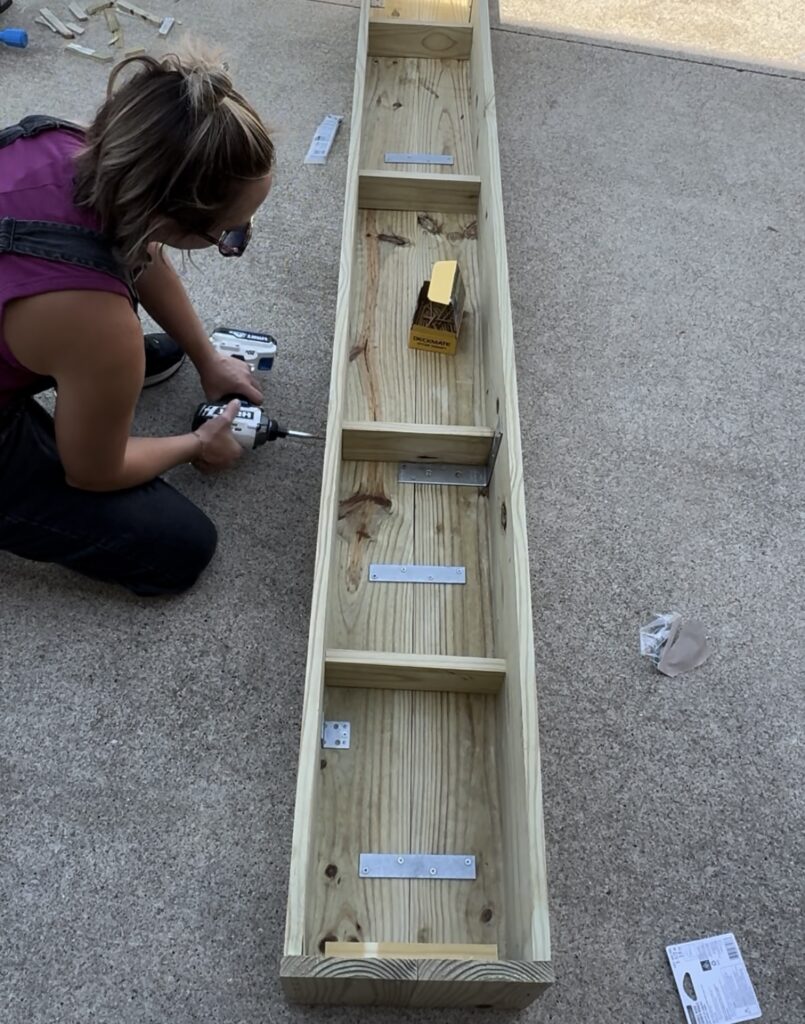
3. Drill Plenty of Drainage Holes
Your new planter needs to drain well—so flip it over and drill several ½-inch holes along the bottom. Take it from me, soggy roots = plant sadness.
4. Sand, Stain, Paint & Protect
Sand all visible and touchable spots, removing splinters and sharp edges (your hands and plants will thank you). Stain with an outdoor-friendly product or use exterior paint—just don’t forget an outdoor sealer for protection.
5. Install: Hanging with Chains & Eye Hooks or Ledger Mounting
Hanging Mount (My Method)
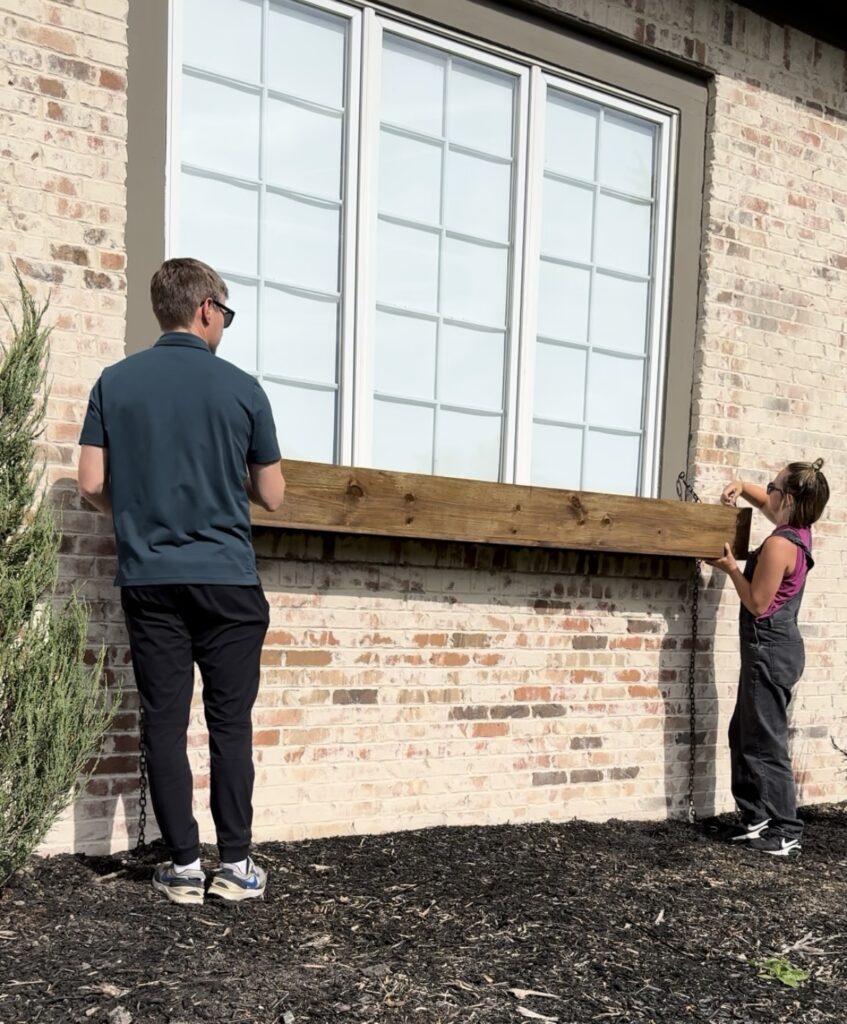
- Place the window box on a brick or concrete ledge beneath your window, or wherever you want your new curb appeal centerpiece.
- Pre-install screw eyes in the window frame or house framing above.
- Attach spray-painted chains from the box to the screw eyes, using quick links so you can easily remove the box come winter or for replanting.

No Ledge? Use a Ledger Board
- Fasten a 1×4 pressure-treated board into the studs right under the window and rest the planter box on top. Still secure the box with chains and eye hooks for rock-solid support.
Pro tip: Secure any loose chain with mending plates, quick links, or extra screws if needed. No one wants a plummeting window box!
Budget-Friendly Planter Tips & Curb Appeal Hacks
- Use scrap wood for bracing or box ends—free is always the best price.
- Spray-paint your hardware for a custom look instead of buying fancy (and expensive) hardware.
- Stock up on exterior screws during sales and use leftover paint/stain from previous projects.
- Looking for more ways to save? Swing by my [DIY curb appeal on a budget] (internal link) ideas for the best bang-for-your-buck upgrades.
DIY Window Box Variations You’ll Love
- Use a plastic liner for added longevity (protects your wood planter).
- Make it an herb garden for your kitchen window—snip those fresh herbs right into your dinner!
- Try a trendy slatted look with narrower boards and spacing for a modern twist.
Choosing Plants for Your Window Planter Box
- Full sun: Go for petunias, geraniums, verbena, marigolds
- Partial shade: Consider begonias, impatiens, coleus
- Shade: Hostas, ferns, or creeping Jenny for that lush vibe
Want your window box to really pop? Try the “thriller, filler, spiller” method: one tall showstopper in the middle, moundy plants around, and trailing greenery tumbling over the edge.
Final Thoughts: Why You Should Build Your Own DIY Window Box
Trust me—nothing compares to the satisfaction (and savings) of making your own budget-friendly window planter. The before-and-after can be jaw-dropping, and it says, “Yeah, I did that!” If you tackle this beginner woodworking project, show off your results in the comments. Want more easy curb appeal projects? Check my [beginner planter builds] (internal link).
🎥 Watch the quick tutorial
Need a quick visual walkthrough? I put together a 2.5-minute video demo you can watch on Instagram. Click here to watch!
And if you are interested in more ideas for around the house, please explore my blog for more.
Let’s make your home look awesome, one window box at a time!
Looking forward to getting this rotten siding taking care of in the coming months. It is all a part of our curb appeal improvement process. Luckily, this pretty window box is currently stealing the show.


